• Welcome to SpeedSolving.com — the world’s largest puzzle community!

    You’re currently browsing as a guest, which means you have limited access to discussions, resources, member profiles, and community features.

    Join 50,000+ cubers and puzzle enthusiasts from around the world to ask questions, share solves, improve faster, and be part of the community.

    Registration is free, fast, and easy — create your account today.

    Already a member? Log in here to hide this message and start participating.

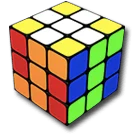
Beginner 3x3 Tutorial (1 alg solution)

... I'm confused with the last 2 edges part.

I'm seeing that a bunch of people in this thread are confused too.

I've updated the tutorial to try and improve the Last Two Edges section. The final case in the section is now solved by doing:
F2, sexy-move, F2
... it's less moves, and hopefully a little easier than the original technique.
 
Cride5 - terrific job with this. I've only been solving the cube for a few weeks, and this is perfect for me. Now my kids want to do it so I've been teaching them this method rather than the standard beginner's methods that I first learned.

A couple of thoughts from a complete beginner's perspective:

I have found that having them solve 8/9 pieces in the first layer (as in the keyhole and 8355 methods?) makes it easier to keep straight where they are, rather than skipping from bottom cross to middle edges and then back down to bottom corners. It may be because I had shown them a layer-by-layer method previously. I personally prefer doing the method as in the guide, because there's more freedom while working on the middle edges.

The kids also have trouble with the last two edges. That always stops them in their tracks, I think because it's the only part of the method that requires remembering which moves go with different states. It was also the stage that took me the longest. I'm curious if there are other possibilities.

Thanks, and again nice job. This should make you famous!
 
@mcmullen cheers for the feedback. I guess the decision to go for middle-layer edges first was to make the steps more consistent. As well as making insertion of the mid-layer edges easier, it also means the corners are solved using the same approach all the way through.

For the final 2 edges, there's a sneaky shortcut alg which you an use: R U R' U R U R' ... or its mirror F' U' F U' F' U' F
These deal with the cases where the final U-layer edge is in the middle layer. Use the RU version if the U-sticker is on the front face, and the FU version where the U sticker is on the right face.

I had a look though the tutorial again, and although everything appears to make sense, it's probably a bit low on words. It almost reads like a computer program lol :p
If I can grab some spare time, I think I'll create a 'wordy' or verbose version to add further explanation to the steps.

As for the next dan brown, I don't think I've qute got my 'Hay world!' quite perfected yet, but I'm workin on it :)
 
Last edited:
I looked at the thread a bunch of times but have never really looked at the method, until now.
I've taught over 20 people and I'm definitely going to start teaching this from now on.
Good job.
 
crider I definitely think your method is an improvement over 8355 - which already was better than most other beginner methods, at least in terms of avoiding long strings of RF2L'UBOMGWTF to remember. And 8355 doesn't seem to have really become popular yet. Your next task: youtube.
 
I was thinking about the "Last Two Edges" stage, and how it seems more difficult than some of the other parts. I'm not good enough of a cuber to know if this works all the time, but what about this:

If you arrange it so that on the top layer you have two correctly placed top-layer edges, one incorrectly placed edge on top (e.g., the red-yellow edge in the position of the blue-yellow edge), and the last middle-layer edge, then when you place the last edge from the keyhole into the top layer, everything should fall into place. I think.

For example if you have two of the three edges done, you can just place the third edge not in the correct spot but in the spot next to it, and put the remaining yellow edge in the keyhole. Then just solve the last edge.

I'm not sure if this always works or if it is easier than the other methods, but it does at least avoid the longer algorithms or knowing what to do with different states. What do you think?
 
OK, so I've added a new 'explanatory' version of the tutorial here:
http://cube.crider.co.uk/beginner.php?v=full

There are also a few edits of the standard (concise) version. Hopefully it will help to clarify some of the more difficult parts, particularly in the final-two-edges phase. As always, any feedback is welcomed.

@mcmullen your approach is an interesting idea. I sometimes find myself purposfully placing an incorrect third edge in some situations during a sexy speedsolve. The problem is that it only works in two out of four possible scenarios. It doesn't work when the fourth edge is left in the top layer after the third has been 'incorrectly' placed.

What is actually happening is that the choice of where the first two edges are placed creates the possibility of a parity situation arising. It means that if the rest of the edges are placed in the correct position relative the first two, then it will end with the R or F layer rotated by 90°. It is because an odd number of replacements or 'swaps' are required to place all the U layer edges correctly (relative to the first two). The way to fix this is to assume that the first two are not in fact solved, and to re-place them in a position that is rotated 90° from where they currently are.
 
Is this the right place to ask about questions about the Sexy Method? I'm new and am trying anything to solve my cube!

I've been through Sexy a few times and can make it to "3x more corners". I turn the cube over and am trying to put the white/top face back together, somehow the top edges get wacky. One edge is in the front right slot so I assume it gets fixed later but I get three messed up edges and loose track of where the corners live at that point. Any idea what's going wrong?

(In case it matters, I memorized enough of CFOP to do 2FL, which I will complete up until one unsolved middle corner, that becomes the slot and I start Sexy method at 3X Top Layer)
 
Last edited:
1 thing what beginners often don't see is that you can place a middle layer edge to the top in 2 ways. They often always try 1 way (for example R) and try again with u moves in between but don't see that you can use F :P.

And in 3x Bottom Layer Corners you forgot to say that you have to turn the bottom layer back (pretty obvious but still :P)
And in 3x More corners if after step 3 you have a piece that doesn't belong in the bottom layer and you go back to step 1 you'll be stuck in an infinite loop I think (to fix you have to turn the bottom layer till it's alligned again)
 
Last edited:
Back
Top