rubik's DIY center cap pooping

daniel0731ex

Veteran
Joined
Dec 10, 2008
Messages
2,294
i just fixed the centercap problem and it doesn't pop as often now

i noticed that the rubik's DIY centercap has little bumps on the side, which makes the cap unstable because it leaves a slight gap between the cap and
the centerpiece.
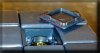
so i cut them off to make it fit closer together. however, the caps still falls off because the inner notch does not fit tightly to the centerpiece. so i did this (the picture is actually a type A cap, not rubik's)

after the mod the cap doesn't fall off anymore:D im now using it as my OH cube
 

Attachments

  • 20080206046.jpg
    20080206046.jpg
    7.1 KB · Views: 461
Last edited:
I just used a bunch of blu-tack. :D

Putting it around the edges of the cap like I've seen before barely helped(!), so I just put a large lump on the cap and place it on. I put enough of it to be touch the circular piece rising above the screwed, and it DOES stay. ALWAYS. 99.99999% percent of time, like germ-x. IT WORKS.

You may get different results though, because my caps don't poop. Never have, never will.
 
the most important part of this mod is cutting the bumps off and make it smooth. if you only do the dents it still wouldn't work.

also, the thing about this mod is that the cap is removable at anytime and is easy to put back on. if you use a sheet of paper you will have to put new paper on everytime you take it off.
 
If my center caps pooped, I honestly have no idea what I would do. I'll just cross that bridge if I ever have to.

Now, when my center caps pop, that's easy to fix. I use a puddy knife and cut into the raised ledges on the under side of the cap with the thin edge of the knife. This causes them to bulge slightly, and this extra pressure keeps them in place a little bit better. When even this fails I use the tiniest amount of superglue on the underside of the corner of the cap. This locks it in place, but don't use a lot. To remove them later for adjusting the screw tension use an x-acto knife or a razor blade to cut the superglue and free the cap.

Hope this helps,
Chris
 
Lol... getting all worked up over the title. Reminds me that there are some little kids out there, not that I'm old
 
Last edited:
god.

you guys are missing my point ˋˊ

Daniel,

Sorry, but many of us have made a thread title typo. Now you know not to do it again ;-)

As for your fix, I've never though to cut at an angle like that. As I mentioned above I use the thin edge of a puddy knife to cut into the plastic, but I cut a straight cut about halfway down the plastic. I'll have to try your angled cut next time and see how it works. If I don't like it, I'll just complete the cut to be flush.

Chris

actually, what i really meant is to remove the little bumps/notches on the outer ridge of the cap

attachment.php


cutting them off will make the cap fit closer toghther because the bumps creates a slight gap between the cap and the center piece, which makes the cap unstable. after you remove the bumps it should fit like a good type c centercap, except that it doesn't have enough friction to keep it on. so making the dents makes the ridge become slightly wider and stretches the centerpiece slightly, thus giving enough resistance to keep the cap on.

if you only dent the cap without removing the bumps it will actually pop even more often, because the dents only stretch the edge of the centerpiece.
 
Last edited:
Back
Top