WeakAsianCuber
Member
- Joined
- Dec 10, 2014
- Messages
- 14
So the core of my gans 357 broke some while ago( it snapped) and I didnt have a chance to get a new core. A few weeks ago , I saw a threat on a chinese cubing forum of a guy using the ipg core for the hualong. So I got the idea to try reviving my gans 357 by trying to use a yj core.
Materials:
YJ core *1
Gans357 pieces and centers
Yj screws*6
gans357 springs+washers *6
Steps:
1) put on 5 gans 357 center caps (no need springs and washers except for 1 center cap) onto the yj core and screw them in lightly to make sure they dont fall off. The center cap that you put springs on should be your side where you start assembling the cube . Also, the center cap opposite to the cap with springs should be the one that you dont put on yet(note not to put springs on the other 4 yet or it will be very hard to assemble the cube.)
2)Build the layer on the side where the center cap have springs. After building the first layer, move on to the second layer. Then build the last layer carefully as the center caps arent stavle at all.
3) after building all the pieces screw in the top center cap (the one that was left empty) without springs to its tightest.
4) now you should have an assembled cube with all center caps on where the bottom one have springs and the top one is screwed on tightly. Note that the other 4 center caps should still be held on loosly.
5) put springs and washers on the 4 loose center caps . The way to do it is to put the tightly screwed center and the one with springs one on the left and one on the right. Then I used 4 thick books to stabilize the ahape of the cube. after that I put on a spring and screw on each center cap. Be very careful when rotating the cube aa you dont want pieces to fall out.
6) after that your cube should be pretty stable. 5 of the centers should have been screwed in with springs and washers. Lastly put spring and washers on the last center cap.
The cube should now be fully assembled and ready to use. I will post pictures to each step later to make it clearer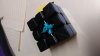
Materials:
YJ core *1
Gans357 pieces and centers
Yj screws*6
gans357 springs+washers *6
Steps:
1) put on 5 gans 357 center caps (no need springs and washers except for 1 center cap) onto the yj core and screw them in lightly to make sure they dont fall off. The center cap that you put springs on should be your side where you start assembling the cube . Also, the center cap opposite to the cap with springs should be the one that you dont put on yet(note not to put springs on the other 4 yet or it will be very hard to assemble the cube.)
2)Build the layer on the side where the center cap have springs. After building the first layer, move on to the second layer. Then build the last layer carefully as the center caps arent stavle at all.
3) after building all the pieces screw in the top center cap (the one that was left empty) without springs to its tightest.
4) now you should have an assembled cube with all center caps on where the bottom one have springs and the top one is screwed on tightly. Note that the other 4 center caps should still be held on loosly.
5) put springs and washers on the 4 loose center caps . The way to do it is to put the tightly screwed center and the one with springs one on the left and one on the right. Then I used 4 thick books to stabilize the ahape of the cube. after that I put on a spring and screw on each center cap. Be very careful when rotating the cube aa you dont want pieces to fall out.
6) after that your cube should be pretty stable. 5 of the centers should have been screwed in with springs and washers. Lastly put spring and washers on the last center cap.
The cube should now be fully assembled and ready to use. I will post pictures to each step later to make it clearer
Last edited: