daniel0731ex
Veteran
- Joined
- Dec 10, 2008
- Messages
- 2,294
http://www.speedsolving.com/forum/showthread.php?28486
Alright!! I'll start straight into the instruction:
Material:
。Paper (it’s OK if the other side is already used, we only need one side)
。A Laser printer (inkjet won't work)
。Some clear tape (Clear tape is preferred, though I used Scotch tape in the demonstraion because I couldn't find clear tape.)
Step 1:resize your image in word so it fits your designated stickers


Step 2: print out the logo

Step 3: cut out the logo

Step 4: put a layer of clear tape over the logo
IMPORTANT – make sure it covers sufficient area so you could cover the whole (designated) sticker.

Step 5: rinse the tape with water and gently rub the paper off.
The paper should come right off and leave the toner behind. There is no meed to worry about the toner being rubbed off -- the bond is strong enogh, so go ahead and make sure there are no remaining fiber of the paper. Don't scoop it out though, the paper should come off easily with rubbing.

Step 6: leave the tape aside to dry completely
IMPORTANT – let it dry naturally, NO DOT try to wipe the water off, as it'll gather debris if you do, which greatly reduces the durability of the adhesive.

Step 7: position the logo onto the designated sticker
Just make sure the image is exactly where you want it to be.

Step 8: CAREFULLY press the logo onto the sticker to rid the layers of air bubbles.
This should be pretty easy if you have re-stickered a cube before.
But for those of you who have no experiance with such thing, simply lay the tape down and SLOWLY push the air out, starting from the center, and proceed outward, make sure no air bubbles are created on the way. Don't worry if you still got some air bubbles trapped inside, they’ll go away eventually with time, so it's not the end of the world.
Step 9: crop the excess tape outside the sticker
Just slowly cut away with the outline of the sticker.

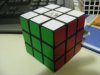
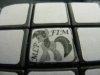
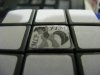
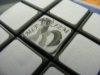
And you’re done!
Enjoy your brand-new Cubeseat stickers!

err, maybe not entirely new, but it works xD
Alright!! I'll start straight into the instruction:
Material:
。Paper (it’s OK if the other side is already used, we only need one side)
。A Laser printer (inkjet won't work)
。Some clear tape (Clear tape is preferred, though I used Scotch tape in the demonstraion because I couldn't find clear tape.)
Step 1:resize your image in word so it fits your designated stickers
Step 2: print out the logo
Step 3: cut out the logo
Step 4: put a layer of clear tape over the logo
IMPORTANT – make sure it covers sufficient area so you could cover the whole (designated) sticker.
Step 5: rinse the tape with water and gently rub the paper off.
The paper should come right off and leave the toner behind. There is no meed to worry about the toner being rubbed off -- the bond is strong enogh, so go ahead and make sure there are no remaining fiber of the paper. Don't scoop it out though, the paper should come off easily with rubbing.
Step 6: leave the tape aside to dry completely
IMPORTANT – let it dry naturally, NO DOT try to wipe the water off, as it'll gather debris if you do, which greatly reduces the durability of the adhesive.
Step 7: position the logo onto the designated sticker
Just make sure the image is exactly where you want it to be.
Step 8: CAREFULLY press the logo onto the sticker to rid the layers of air bubbles.
This should be pretty easy if you have re-stickered a cube before.
But for those of you who have no experiance with such thing, simply lay the tape down and SLOWLY push the air out, starting from the center, and proceed outward, make sure no air bubbles are created on the way. Don't worry if you still got some air bubbles trapped inside, they’ll go away eventually with time, so it's not the end of the world.
Step 9: crop the excess tape outside the sticker
Just slowly cut away with the outline of the sticker.
And you’re done!
Enjoy your brand-new Cubeseat stickers!
err, maybe not entirely new, but it works xD
Last edited by a moderator:


 Do you have pictures of your finished product?